How to Use the Image Library at 123Print®
Finding print-quality images online is usually a daunting task. Even finding something seemingly simple like a social media icon or basic backgrounds with patterns or textures can be quite difficult, especially if you don’t know what to look for regarding image size and quality.
On top of that, when you do manage to find a good quality image, they often cost money or you have to worry about copyright issues and watermarks.
The good news is that 123Print® has done all the hard work of collecting hundreds of high-quality backgrounds, images, and type designs, and you have access to all of it for free right in our Image Library.
How to Find the Image Library
You can find the Image Library when you open the Product Editor for any product on our site. Simply click on the blue ‘Customize’ button to open the Product Editor.
Once in the Product Editor, click on the ‘Image Library’ icon on the left-hand side.
This resource makes it super simple to add to, enhance, or create your own design from scratch without the headache of finding quality images on your own.
Using the Image Library to Enhance Your Existing Design
First, let’s talk about using the Image Library to enhance your existing design. This is probably the most common use of the library; I’m always delighted to come across customer orders with creative additions from the Image Library that I would have never thought of myself. Want to add a fancy ampersand to your wedding or party invitation? Social media icons to your marketing materials? Or just a cute Santa Claus illustration to the inside of your holiday card? We’ve got you covered! The best part is all of these images are easy to find and add. Everything is organized into categories and, when you can’t find what you’re looking for, you can always use the search window at the top. Rest assured that these images will be the right resolution and file types.
This allows you to make your products look more professional, eye-catching, or just plain fun!
Of course, you could also use the Image Library to create your own beautiful design from scratch by layering our high-quality backgrounds, type, and images, to create something that’s uniquely yours! Remember, you can always upload your own images and logos and add those as well.
Our Step-by-Step Process
Want to see this process in action? Follow these steps below to re-create a custom Wedding Invitation I made from using only our Image Library!
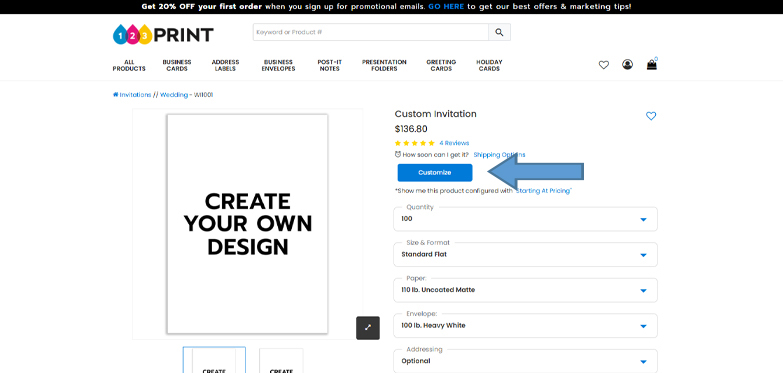
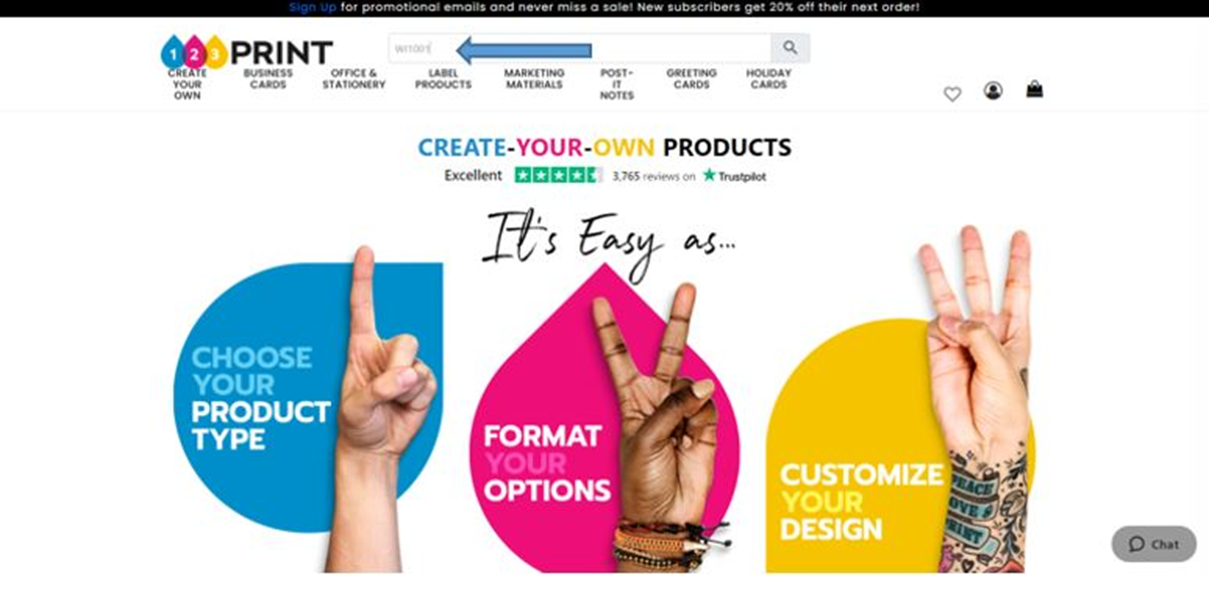
#1 Search product WI1001 on our site. This is the product number for the Design Your Own Wedding Invitation.
#2 Click on ‘Customize’
When the product comes up, click on the image and then the blue ‘Customize’ button to open the product in the product editor.
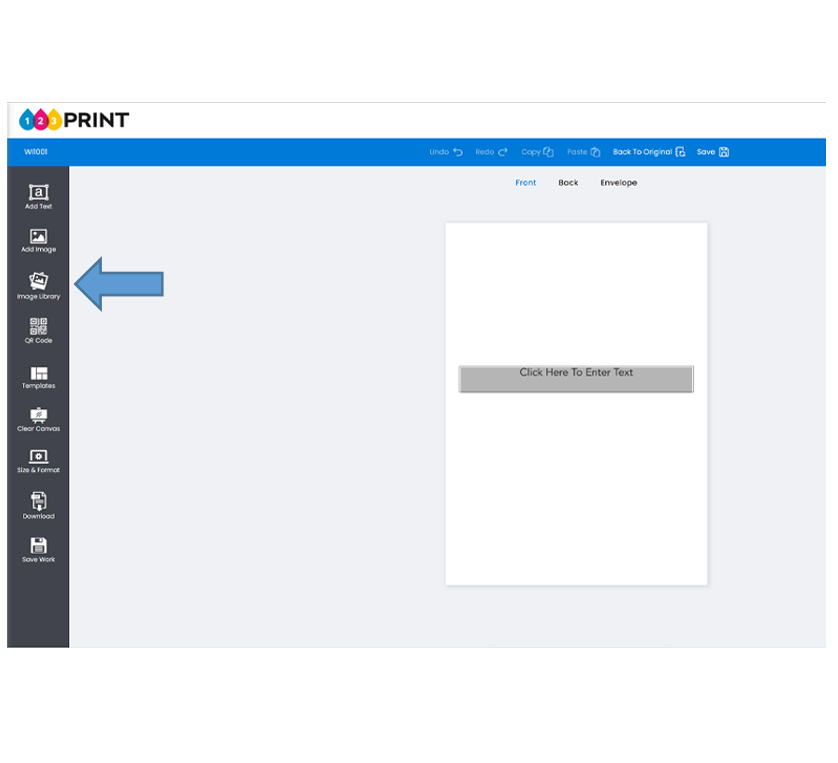
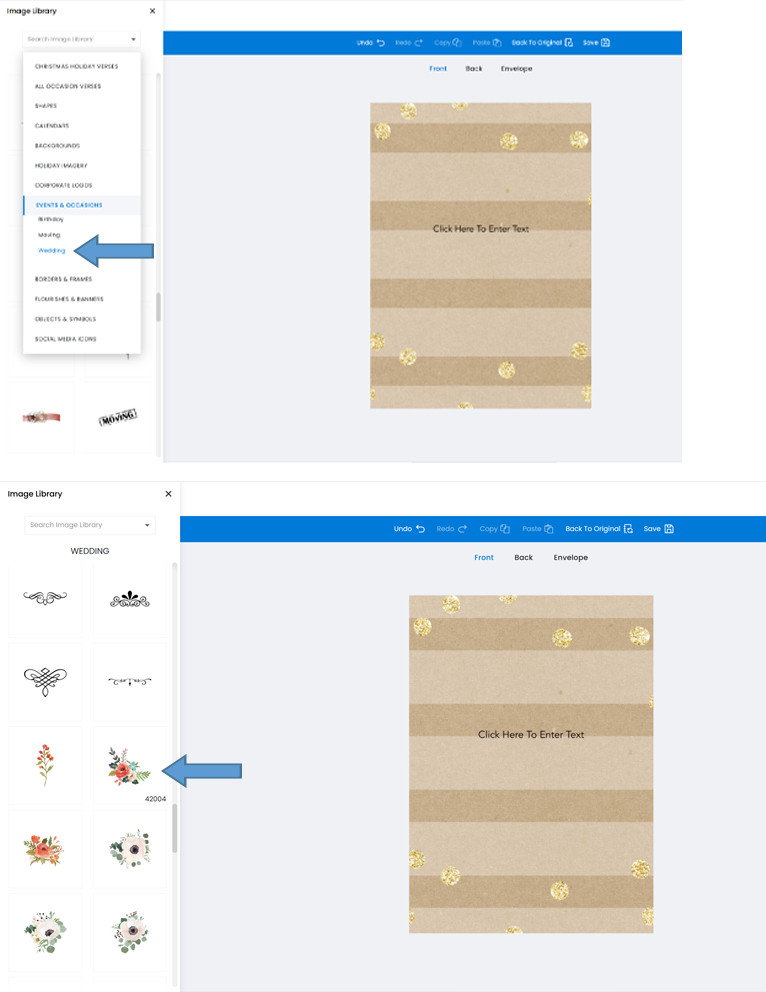
#3 Click the 'Image Library' icon
The 'Image Library' icon is the third one down on the dark gray toolbar to the left.
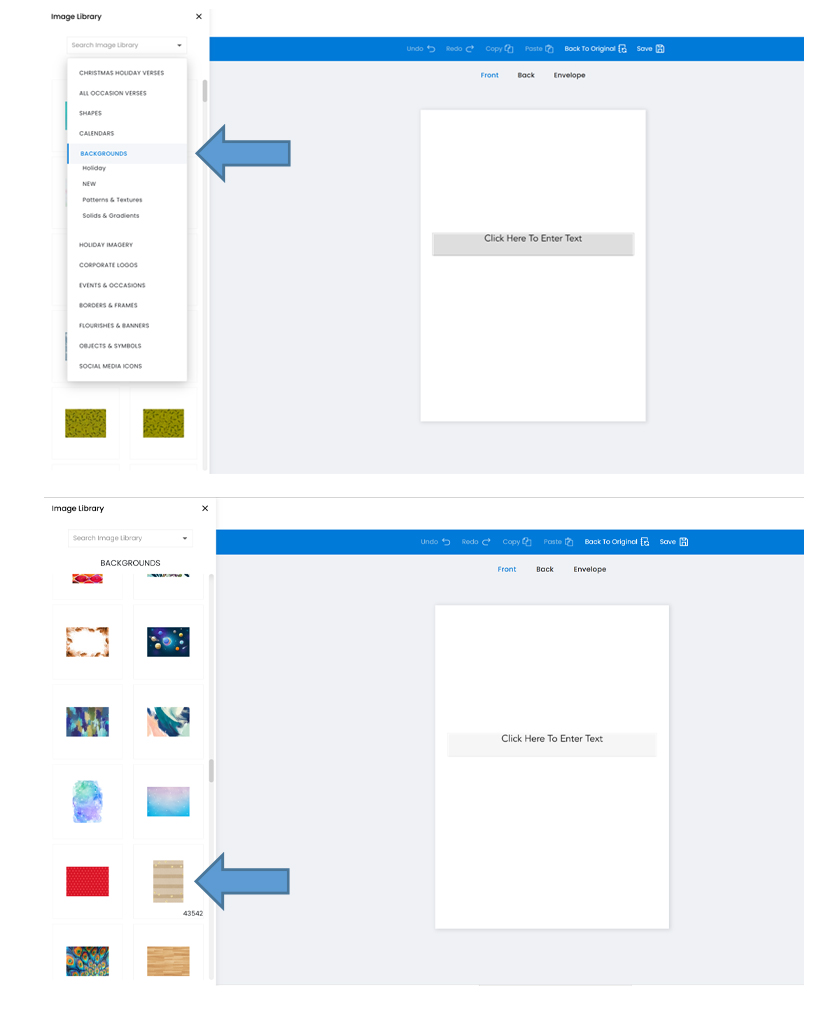
Use the search feature to locate the category of images that you want to look for to use on your design.

#4 Add a Background
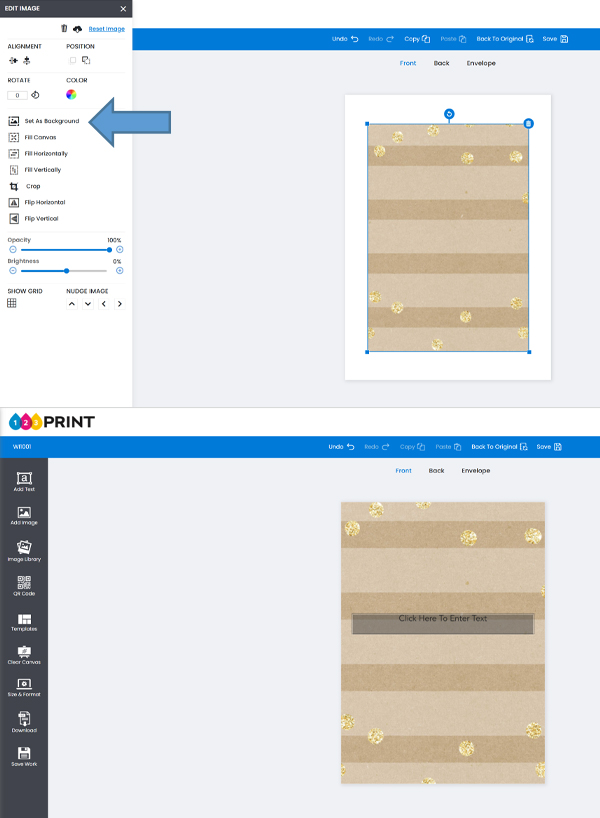
I started with adding a background for this design and built on top of that, but keep in mind that you can always add or change a background at any time. Use the drop-down menu at the top and select ‘Backgrounds’. Scroll down until you find a tan-striped pattern with gold dots. If you hover over the image, it should say 43542. When you click on it, it will be automatically added to your card.
#5 Set the image as the background
Select ‘Set As Background’ within the ‘Edit Image’ panel that pops up on the left.
Please note that you always want to be sure to set your background image as the background using this tool, as this ensures that it fills the canvas completely and that you won’t be left with any unsightly white border or edges after production.
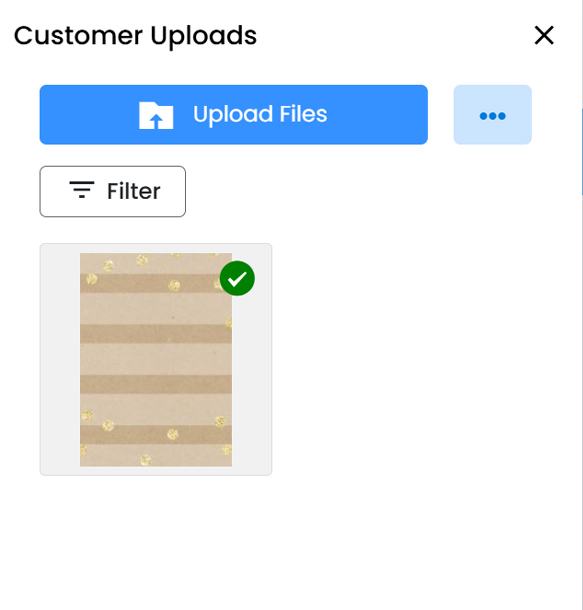
For easy access, any images you pull from the library will appear in your ‘Customer Uploads,’ which pops up on the left when you click on the ‘Add Image’ icon.
Note that the green check mark in the upper right corner indicates that the image is currently being used on your card.
#6 Add the same background to the back of the card
I added the same background to the back of the invitation. You can do this simply by clicking on ‘Back’ above your virtual card to switch to the back panel and repeat steps 4 and 5.
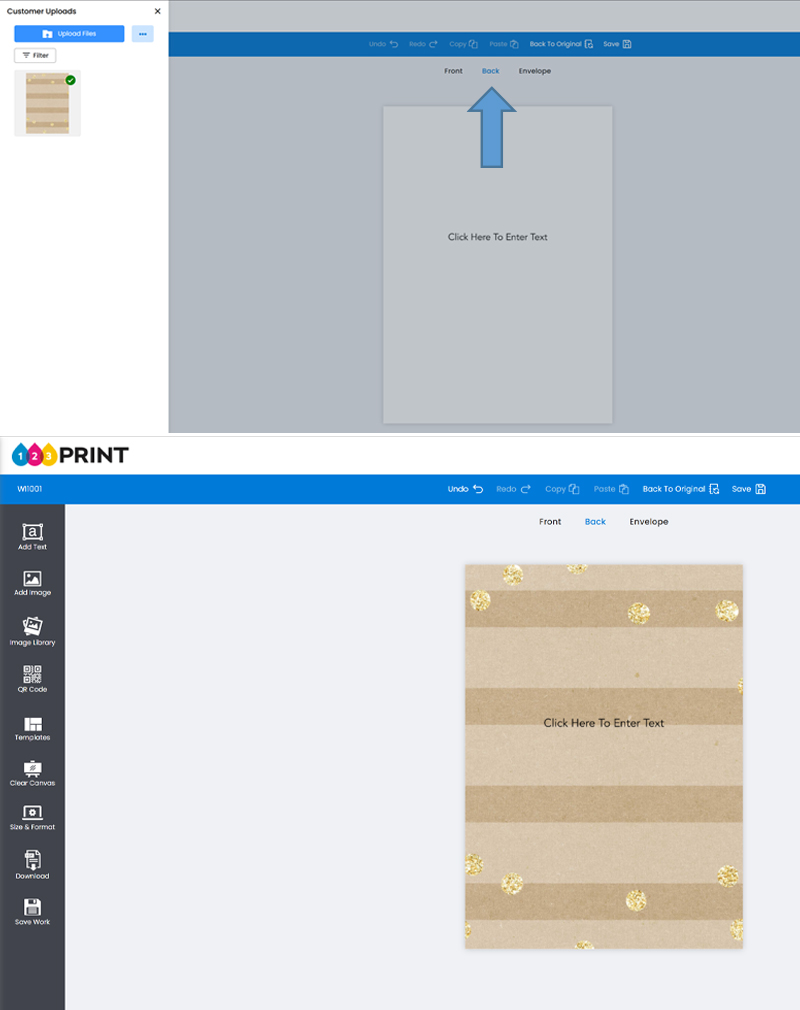
Make sure to switch back to the front afterwards so that we can complete the design. You can always add more text and images to the back later on if desired.
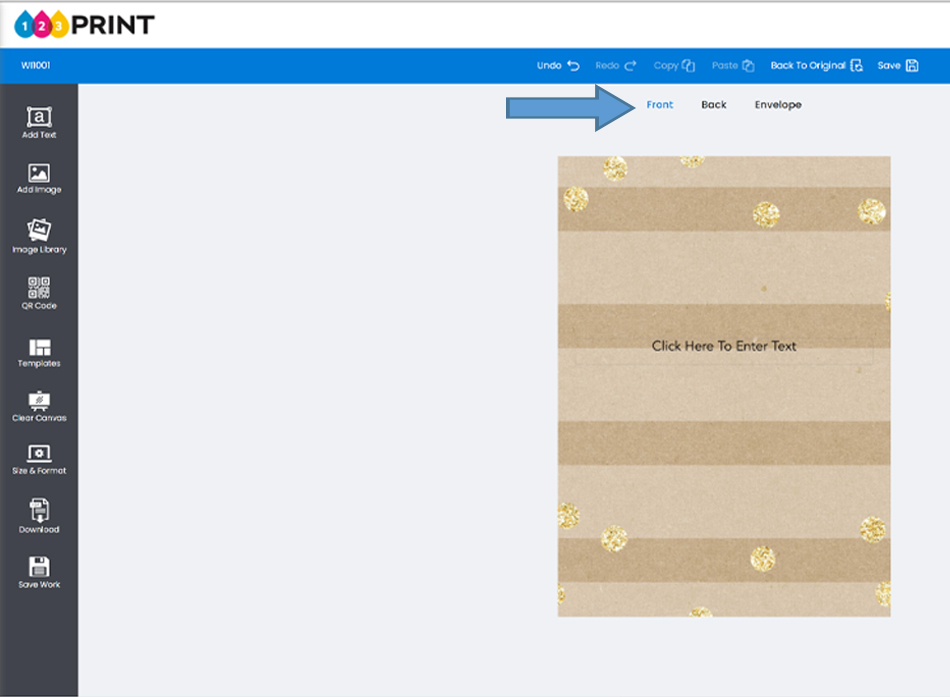
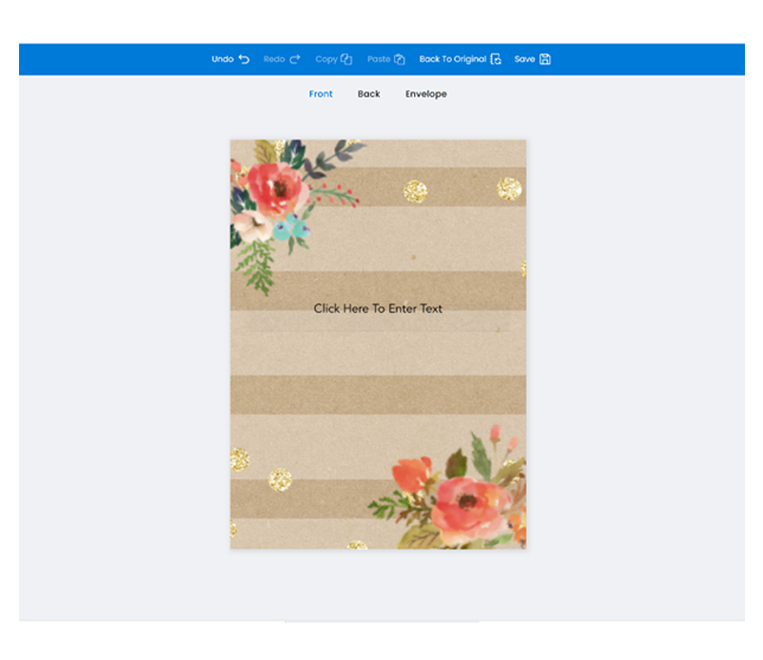
Now we have a lovely background. It would be a great invitation on its own with just some stylized text and flourishes if you like a more minimalist look, but I opted for adding some florals to my invitation. Let’s proceed to step 7 to add them.
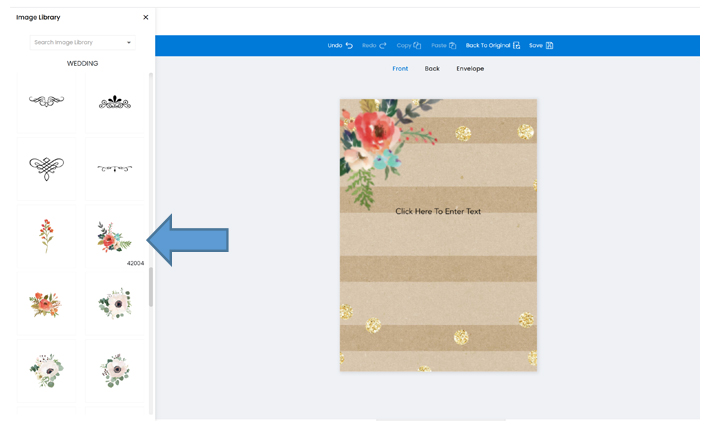
#7 Add some embellishments
Select ‘Wedding’ under ‘Events & Occasions’ in the drop-down menu of the Image Library and scroll until you see the watercolor florals. I used floral 42004 in the top left corner and 42005 in the bottom right. Then, I just resized and rotated them until they looked good to me. Remember that you can resize, remove, or rotate these images at any point during this process.
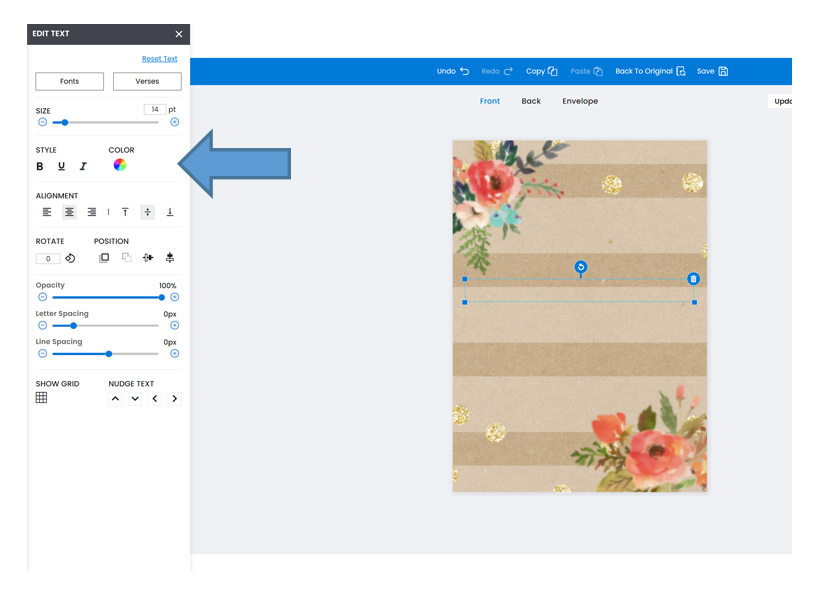
#8 Add Custom Text
Lastly, I added the text. You should see a textbox that says “Click Here to Enter Text.” If you do not, simply select the ‘Add Text’ icon on the left. You can also add additional textboxes using this tool as needed. From here, it’s easiest if you type in your desired text first before adjusting the text style and format using the ‘Edit Text’ toolbar that appears when you click the ‘Add Text’ icon.
I went with a combination of 14pt Optima at the top and bottom along with 48pt Bickham script for the names. This combination of fonts looks formal and elegant without being overly traditional or dated. For tips on font combinations, see our previous article 3 Essential Rules for Using Multiple Fonts in Graphic Design. I selected a dark green color (#1c4220) from our selection of standard colors to use for all of the text on my invitation, because this color is dark enough to be legible against the background while matching some of the green in the watercolor florals.
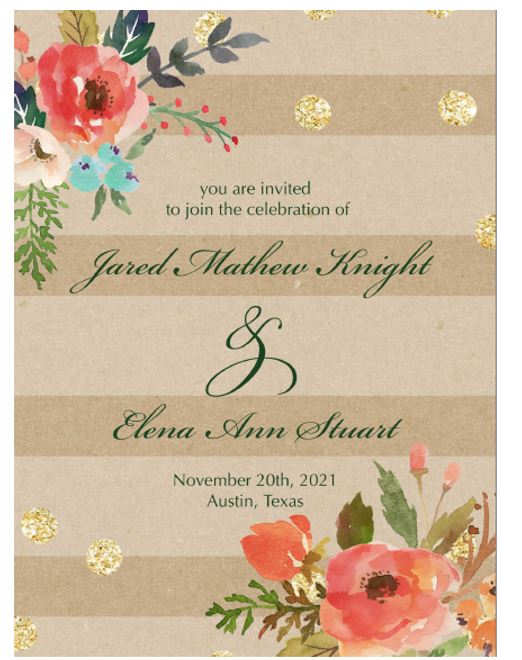
Remember you can also add more text and information to the back of your invitation! I chose to keep the front clean and simple in this case. For more design tips, refer to our article 3 Expert Ways to Make Your Art Pop.
Why Should You Use 123Print®?
At 123Print®, we are always trying to find new, innovative ways to make our products outstandingly customizable and easy to order. We want our customers to feel empowered to create products that suit their needs precisely and possess a personal touch that’s uniquely theirs, and we feel that our Image Library truly is one of the best tools to help achieve this.